Thai Green Curry recipe
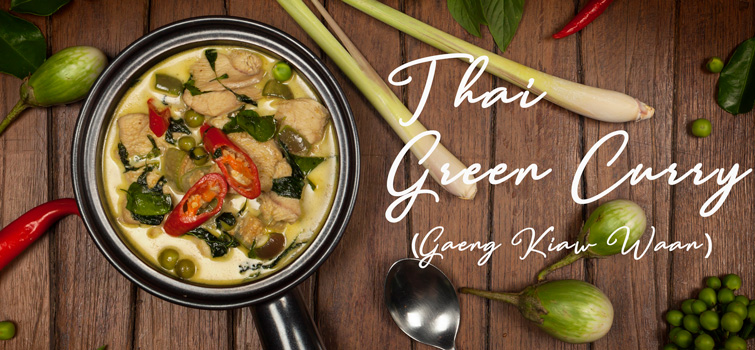
Thai Green Curry
Thai Green Curry, or “Gaeng Kiew Waan” in Thai, is probably one of Thailand’s most well known dishes, and rightfully so. This curry is aromatic, rich, and packs just the right amount of heat to have you going back for more. The great thing about this dish is that it can be easily adapted for vegetarians, so it’s a win win for everyone!
Green Curry is easy to make, especially if you will be using a ready made chili paste. Making your own paste is very rewarding,and I do recommend trying it out when you can – – however it takes quite a bit of time, and it can be rather difficult to find all the ingredients, depending on where you live. You’ll find a ready made Thai green curry paste in most Asia shops, and trust me, it will taste just as good! It’s really about finding that balance in flavours. We’ll be using a ready made chili paste in our recipe, but we’ll share our homemade curry paste recipe with you in one of our future blogs, so stay tuned and subscribe to our blog to make sure you don’t miss it.
Ingredients ( for two servings)

Ingredients needed for a Thai Green Curry
-200 grams of sliced chicken breast or thighs
-1 1/2 Tbsp green curry paste
-2 Tbsp sunflower oil
-250 ml Coconut milk
-50 ml water
-1 tbsp soy sauce
-2 tsp oyster sauce
-1 tsp fish sauce
-1 1/2 Tbsp sugar
-handful of Thai basil leaves (Hora-pha in Thai)
-10-15 pea eggplants
-5 Thai eggplants
-1 Thai “prik jinda” chili (fresh)
-3 Kaffir lime leaves
**Notes: If you can’t find Thai eggplants/pea eggplants as they can be tricky to come across even in Asia shops, you can easily substitute it with other vegetables. I would recommend using carrots, baby corn, cauliflower, broccoli, and string beans as all of them still have a bit of bite to them after being cooked. But feel free to use any veg you like, these are just the ones we recommend. Be sure to consider the cooking time of specific vegetable, so to not overcook**
Directions:
PREP:
1) If you’ve got Thai Eggplants, cut each eggplant into 4-8 parts depending on how big they are. Place them into a bowl of water to keep them from browning. If you’ve got pea eggplants, remove them from the stem.
2)Slice chicken breast, or prepare your chicken thighs
3)Take the Thai basil leaves off from the stem so you have roughly a handful. Break apart your kaffir lime leaves by folding the leaf in the middle, and then pulling the leaf away from the stalk. Slice your chili at a 45 degree angle ( they will add spice to your curry but also add to the aesthetics)

COOKING:
1) Start off by adding 2 Tbsp of sunflower oil to your pot , on a low flame. Add in your 1 1/2 Tbsp of green curry paste, stirring it around to avoid it staying in a clump, and evenly spread it out. The paste can easily burn, and go bitter, so be sure to keep an eye on it. Once the paste starts to give off an aroma and you can see the oil taking on a bit of the green colour, add in about 50 ml of the 250 ml of coconut milk. We want to thicken the coconut milk and have the oils separate, so we’re left with a nice layer of creamy coconut on top of the curry at the end.
 2) When the coconut milk has thickened and mixed nicely with curry paste, about 1 minute, add in your chicken. Add your fish sauce to the chicken, and stir. It’s important to add the fish sauce in the beginning and not afterwards, as we just want it to enhance the flavour but not have it taste fishy. Follow by adding in your soy sauce and oyster sauce. **if you have pea eggplants put them in now as well, as they take longer to cook** Stir making sure all sauces are incorporated and that the chicken is coated.
3) Add in remaining coconut milk, and 50 ml of water to dilute the coconut milk a little. Add in your sugar, and leave the curry on a medium flame.
4)Once the curry starts to boil add in your Thai eggplants, or if you don’t have any, your choice of vegetables along with your kaffir lime leaves. Depending on what vegetables you’ve used, approximately cook curry for 10-15 minutes. Vegetables should still have a bite, and not be mushy, so be sure to check every now and then.
5)When your curry is almost finished, add in your Thai basil, and red sliced chili ( you don’t need to add all of it,remember this will add a bit of spice to it) – – taste your curry to see if you’d like to adjust the flavour, whether you’d like it more sweet, salty (soy sauce), or spicy. If you think it’s not spicy enough, you can add in your extra green curry if you chose to fry off extra in the beginning. If it’s too spicy for you, add in more coconut milk. After the final adjustments, you’re ready to serve and enjoy!
TIPS:
1) If you’re going to make a vegetarian version, substitute the oyster sauce for a mushroom sauce. Add less sugar or even leave adding it till the end, as the vegetable may already have a natural sweetness.
2)Try to avoid canned coconut milk, as the fat content in it often separates, and will form a layer at the top. Even after mixing, it somehow doesn’t have the same flavour. For the best results, go for a carton of coconut milk, I would recommend the brand “Aroy D” which is a brand you will find at most Asia stores.
3)If you live further away from an Asia store, or market where you can get these ingredients, you can freeze some of them. The Kaffir lime leaves, pea eggplants and the Thai Basil can be frozen, as well as the curry. For the basil and kaffir lime leaves, wash them and then thoroughly dry them with a paper towel. Put them in a zip lock bag, trying to get out as much air as possible. That’s it! When next cooking with it,specifically the basil, take out only the amount needed ,not taking the whole bag out, as the leaves may go brown when they thaw. Most curry pastes you can keep pretty long just in the fridge, but if you wish to prolong it’s shelf life, put the curry into the compartments of an ice cube tray, and just pop out the needed amount when you’re cooking.
We aren’t professional cooks, but we love cooking and being able to share our recipes with you. If you have any questions about the recipe, feel free to comment !